
Building OpenOCD for Windows using MSYS2
Introduction
In the past, building OpenOCD on Windows was a complicated process due to its numerous dependencies and lack of availability on the Windows platform. Fortunately, with MSYS2, building OpenOCD has become a simple task. For those who require the latest stable version of OpenOCD on MSYS2, it is available as a binary and can be installed with a single command.
However, there may be cases where you need to build the development version of OpenOCD or apply some patches from the OpenOCD Gerrit repository. Using MSYS2 and PKGBUILD from the upstream repository, accomplishing these operations is now easy. In this article, we’ll guide you through the steps required to build OpenOCD on Windows using MSYS2.
Note that when I first wrote this article, my main objective was to provide a simple recipe for building OpenOCD on Windows and creating a standalone version suitable for ChibiStudio. However, the article’s purpose has since expanded to address a broader audience. Whether you’re looking to install OpenOCD in MSYS2 from binary, compile and install OpenOCD in MSYS2 from the development repository, or export OpenOCD as a standalone application, this article has got you covered.
About MSYS2
What is MSYS2
MSYS2, short for Minimal SYStem 2, is a lightweight application built on Cygwin and MinGW-w64, designed to run on Windows. With MSYS2, you can use autotools, revision control systems, and build native Windows applications using MINGW-w64 toolchains. Installing packages is simplified since the creators have ported Arch Linux’s Pacman. This brings powerful features like dependency resolution and simple complete system upgrades. When launched, MSYS2 appears as a basic terminal.
MSYS2 consists of three subsystems, and each has its corresponding package repository. They are msys2, mingw32, and mingw64.
- The mingw subsystems are the project’s primary focus and provide native Windows programs. These programs are built to work well with other Windows programs, regardless of the other subsystems.
- The msys2 subsystem provides an emulated, mostly POSIX-compliant environment for building software, package management, and shell scripting. These programs exist in a virtual, single-root file system, with the root being the MSYS2 installation directory. While the programs are designed to work well with native Windows programs, there may be some limitations.
Setup of MSYS2
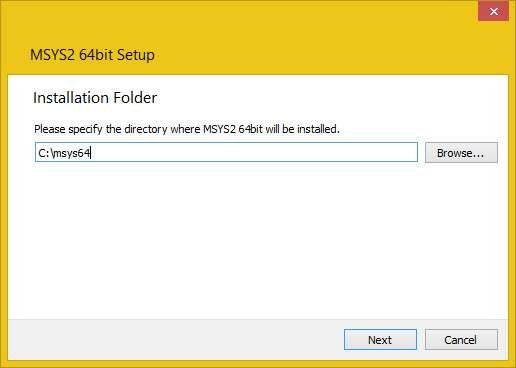
You can download MSYS2 as an executable from SourceForge. The installation process is straightforward, and it creates a folder, usually under C:, named msys64 (or msys32 for 32-bit systems). Once you have completed the installation, you can launch the shell through one of the three .exe files available in the installation folder, each of which is associated with one of the three MSYSTEM subsystems.
The general suggestion is to use mingw32 instead of mingw64 to have a program compatible with the old 32-bit systems. You can verify your current MSYSTEM by running the following command:
echo $MSYSTEM
To avoid any issues related to low permission levels, it is advisable to launch MSYS2 as Administrator. Additionally, note that the classical copy-and-paste hotkeys may not work as expected. Instead, you can right-click on the terminal to paste or use CTRL+Ins and Shift+Ins instead of CTRL+C and CTRL+V.
Getting OpenOCD
There are two ways to obtain OpenOCD with MSYS2:
- We can install the pre-built version of OpenOCD that comes with MSYS2 and then extract it.
- We can build OpenOCD by installing the necessary tools and downloading the latest version from the git repository.
Both options are valuable. The first is simpler and provides us with the latest stable version of OpenOCD built by the developers. However, there may be instances where we require the latest development version, which may support new microcontrollers or include bug fixes that are essential for us.
Install the pre-build version of OpenOCD
MSYS2 comes with a pre-built version of OpenOCD, which can be installed to run it directly from the command line. While this may not be useful if your ultimate goal is to build OpenOCD from the repository, it’s worth mentioning if you want to use OpenOCD from the MSYS2 command line.
Once installed, creating a standalone version of OpenOCD by extracting it and its dependencies from the C:\msys64\mingw32 (or C:\msys64\mingw64 for the 64-bit version) folder is simple and suitable for most scenarios. To install the 32-bit version, you can use the following command:
pacman -S mingw-w64-i686-openocd-git
To install the 64-bit version, you can use the following command:
pacman -S mingw-w64-x86_64-openocd-git
Once the setup is complete, you can use OpenOCD in MSYS2 as a native command. For instance, to launch OpenOCD for an STM32 Nucleo-64 F401, you can use the following command:
openocd -f "board/st_nucleo_f4.cfg"
Building OpenOCD from the repository
To compile packages, we need to update MSYS2 and install and configure some tools. Even if you’ve done this before, it’s still a good idea to update your system at least once.
Update MSYS2
The following command updates MSYS2. While it usually works on the first try, major changes may cause it to fail. It’s recommended to run the command, restart the system, and rerun the command until it reports that there are no packages left to update. The command to update MSYS2 is:
pacman -Syuu
Install and configuring the needed tools
We now have to install the base development package with this command
pacman -S base-devel
The MinGW toolchain. If we want to install the 32-bit version the command is:
pacman -S mingw-w64-i686-toolchain
If we want to install the 64-bit version the command is:
pacman -S mingw-w64-x86_64-toolchain
Then we need git
pacman -S git
Note that at first use git requires configuring our identity. To do this we must use these commands (obviously using your identity and your email):
git config --global user.name "John Doe"
git config --global user.email "johndoe@example.com"
As suggested by Kristof (see comments below), the following commands enlarge the memory allocated to git, preventing crashes when cloning large repositories:
git config --global pack.windowMemory "100m"
git config --global pack.packSizeLimit "100m"
git config --global pack.threads "1"
Cloning the upstream packages repository
As mentioned earlier, each MSYSTEM has its own package repository. To obtain the packages needed for OpenOCD and its dependencies, we must clone the MINGW-packages repository.
For this article, I will be using my home folder (~) as the workspace. The home folder is located at C:/msys64/home/[winusername]. Therefore, I will clone the repository to this location using the git clone command.
cd ~
git clone https://github.com/Alexpux/MINGW-packages.git
If the git clone command executes successfully, a new folder named MINGW-packages will be created in our home folder. This folder contains numerous sub-folders, each containing a PKGBUILD file. PKGBUILD is a set of instructions that are required to build a tool while resolving its dependencies.
Building OpenOCD
Now we are able to build OpenOCD from its repository. If we want to build the 32-bit version we have to issue
export MINGW_ARCH=mingw32
cd ~/MINGW-packages/mingw-w64-openocd
makepkg-mingw -sLf
Otherwise
export MINGW_ARCH=mingw64
cd ~/MINGW-packages/mingw-w64-openocd
makepkg-mingw -sLf
The procedure will require some time, depending on your computer. Once the process is complete, navigate to the mingw-w64-openocd-git folder. Here, you will find:
- A folder named pkg, which contains the built package
- A folder named src, which contains the source code
- A tar file containing the built package and the source code, which is ready to be installed
Installing the freshly built OpenOCD (optional)
If you want to install OpenOCD in your MSYS2 system to run it from the command line, you can use the following command to install OpenOCD from the tar file you just created.
pacman -U mingw-w64-*-openocd-*-any.pkg.tar.xz
Similar to installing from binary, this enables you to use OpenOCD in MSYS2 as a native command. The key difference is that you are now using the latest development version of OpenOCD.
Exporting OpenOCD as stand-alone
If you want to use OpenOCD as a standalone tool, you must also build its dependencies and copy them to a separate folder along with the OpenOCD binary. If you have already installed OpenOCD, the dependencies are available in the C:\msys64\mingw32 (or C:\msys64\mingw64 for the 64-bit version) folder.
Building the dependencies
The following commands, run one by one, build each of the dependencies of OpenOCD. Execute them once at a time being sure that no error is given
cd ~/MINGW-packages/mingw-w64-confuse
makepkg-mingw -sLf
cd ~/MINGW-packages/mingw-w64-capstone
makepkg-mingw -sLf
cd ~/MINGW-packages/mingw-w64-hidapi
makepkg-mingw -sLf
cd ~/MINGW-packages/mingw-w64-libftdi
makepkg-mingw -sLf
cd ~/MINGW-packages/mingw-w64-libjaylink-git
makepkg-mingw -sLf
cd ~/mingw-packages/mingw-w64-winpthreads-git
makepkg-mingw -sLf
cd ~/MINGW-packages/mingw-w64-libusb
makepkg-mingw -sLf
cd ~/MINGW-packages/mingw-w64-libusb-compat-git
makepkg-mingw -sLf
Composing our package
Now that we have all the necessary components, we can create the standalone folder. The following commands will copy these pieces into a single folder and rearrange them to obtain a structure similar to that released by the OpenOCD team through the Freddie Chopin website.
This will create the standalone folder named openocd in the home directory C:\msys64\home\[winusername].
if [ "$MINGW_ARCH" == "mingw32" ]; then
 MINGW_PACKAGE_PREFIX="mingw-w64-i686"
 MINGW_FOLD="mingw32"
else
 MINGW_PACKAGE_PREFIX="mingw-w64-x86_64"
 MINGW_FOLD="mingw64"
fi

cp -avr ~/mingw-packages/mingw-w64-confuse/pkg/${MINGW_PACKAGE_PREFIX}-confuse/${MINGW_FOLD}/ ~/
cp -avr ~/mingw-packages/mingw-w64-capstone/pkg/${MINGW_PACKAGE_PREFIX}-capstone/${MINGW_FOLD}/ ~/
cp -avr ~/mingw-packages/mingw-w64-hidapi/pkg/${MINGW_PACKAGE_PREFIX}-hidapi/${MINGW_FOLD}/ ~/
cp -avr ~/mingw-packages/mingw-w64-libftdi/pkg/${MINGW_PACKAGE_PREFIX}-libftdi/${MINGW_FOLD}/ ~/
cp -avr ~/mingw-packages/mingw-w64-libjaylink-git/pkg/${MINGW_PACKAGE_PREFIX}-libjaylink-git/${MINGW_FOLD}/ ~/
cp -avr ~/mingw-packages/mingw-w64-winpthreads-git/pkg/${MINGW_PACKAGE_PREFIX}-libwinpthread-git/${MINGW_FOLD}/ ~/
cp -avr ~/mingw-packages/mingw-w64-libusb/pkg/${MINGW_PACKAGE_PREFIX}-libusb/${MINGW_FOLD}/ ~/
cp -avr ~/mingw-packages/mingw-w64-libusb-compat-git/pkg/${MINGW_PACKAGE_PREFIX}-libusb-compat-git/${MINGW_FOLD}/ ~/
cp -avr ~/mingw-packages/mingw-w64-openocd/pkg/${MINGW_PACKAGE_PREFIX}-openocd/${MINGW_FOLD}/ ~/
mv ~/${MINGW_FOLD} ~/openocd
mv ~/openocd/share/openocd/scripts ~/openocd/scripts
cp -avr /${MINGW_FOLD}/bin/libgcc_s_dw2-1.dll ~/openocd/bin
cp -avr /${MINGW_FOLD}/bin/libjaylink-0.dll ~/openocd/bin
rm -rf ~/openocd/share
Additional notes about patching
If you want to patch the repository, a good approach would be to duplicate the /mingw-packages/mingw-w64-openocd-git folder and edit its PKGBUILD by adding some git commands.
For example, some time ago I had to add two patches to support STM32F746G Discovery and this is how I edited the PKGBUILD:
pkgver() {
  mv "${srcdir}/code" "${srcdir}/${_realname}"
  cd "${srcdir}/${_realname}"
  printf "r%s.%s" "$(git rev-list --count HEAD)" "$(git rev-parse --short HEAD)"
  printf "%s.%s.%s" "$(git fetch http://openocd.zylin.com/openocd refs/changes/54/2754/2)" "$(git fetch http://openocd.zylin.com/openocd refs/changes/55/2755/4)" "$(git checkout FETCH_HEAD)"
}
What I did was to add a printf() in the function pkgver() containing additional git commands. Maybe not the cleanest solution but it worked at the time.
Conclusions
This article serves as a useful reference for building OpenOCD using MSYS2. While it was written with the purpose of building OpenOCD for ChibiStudio, the steps provided here are applicable for any project that requires building OpenOCD on Windows using MSYS2.
It is worth noting that while these steps have been tested and verified, there may be cases where they do not work as expected. In such instances, I encourage you to reach out and leave a comment below. Your feedback will be valuable in updating and improving this documentation.
Thanks for this great article!!! It is so helpful.
One item of errata: this command:
>>pacman -S ${MINGW_PACKAGE_PREFIX}-ftdi
didn’t work for me: package not found error.
I suppose you instead meant:
>>pacman -S ${MINGW_PACKAGE_PREFIX}-libftdi
I am having difficulty building the first mingw package:
$ cd ~/mingw-packages/mingw-w64-libusb
$ makepkg –config ${MAKEPKG_CONFIG} -i
==> ERROR: Cannot find the strip binary required for object file stripping.
I’m running windows 7 here. Don’t know if that would mess it up. I followed all your other instructions carefully.
I found a solution to the “missing strip binary” problem. Just run:
>> export PATH=${PATH}:/mingw64/bin
The “strip.exe” binary was sitting in /mingw64/bin
Hey,
Thanks for these comments. I need to update the article. I think something is changed in last months. I will make some tries…
Hi Rocco,
I have the following error at the end:
$ makepkg –config ${MAKEPKG_CONFIG}
==> ERROR: conflicts should be an array
==> ERROR: provides should be an array
What should I do?
Thanks so much for your help
Dear, as you can see on top of this article, I have updated it yesterday since I had to rebuilt openocd and I experimented some problems.
My suggestion is to delete the old files and restart the whole procedure. By the way, if you want to skip the procedure, I have a copy of OpenOCD. I can add it in the download section.
Hi Rocco,
That would be awesome!
Will your copy work on a 64-bit Windows 10 machine?
PS: I just did the whole procedure today. So probably your update yesterday didn’t work for my specific case. Anyway, I will be extremely happy to get your executable 🙂
Yes, I am using it in ChibiStudio and I have tested it on Win7 32bit and Win7 64bit. I have shared it to the ChibiOS community and I haven’t received any report ’til now. It is now available on the download page in the last section.
Hi Rocco.
Sadly it doesn’t work. I get an error when starting up “openocd.exe”:
” The program cannot get started because libgcc_s_dw2-1.dll is missing on your computer. You can possibly solve this issue by reinstalling this program on your computer”.
Can you post the arguments you have used while launching openocd? What interface are you using?
This is how I open it:
>”C:\Apps\OpenOCD-0.9.0-Win32\bin\openocd” -f “C:\Apps\OpenOCD-0.9.0-Win32\share\openocd\scripts\interface\stlink-v2.cfg” -f “C:\Apps\OpenOCD-0.9.0-Win32\share\openocd\scripts\target\stm32f7x.cfg” -s “C:\Apps\OpenOCD-0.9.0-Win32\share\openocd\scripts”
I’ve been reading a bit on StackOverflow about this missing “libgcc_s_dw2-1.dll” file. Apparently this issue arises if you’ve built the executable without certain compiler flags. The quickest fix is to find that dll file inside your compiler (I cannot find it in mine), and put it also in the download section. I just need to put that dll in the same folder as the “openocd.exe”, and then it should work 🙂
Here is the StackOverflow question related to the issue:
http://stackoverflow.com/questions/4702732/the-program-cant-start-because-libgcc-s-dw2-1-dll-is-missing
Thank you so much for your help 🙂
Take a look to chapter 2.6 of this article. There are commands I use to launch it from bash. Note that according to your environment variables you should or should not use the whole path to launch openocd.exe.
Note: I have deleted the original content of my folder “OpenOCD-0.9.0-Win32”, and replaced it with the content from your downloaded zip folder. So I have sort of ‘updated’ my OpenOCD version in a manual way 🙂
I just downloaded the missing dll here:
http://www.opendll.com/index.php?arch=32Bit&file-download=libgcc_s_dw2-1.dll&version#
Now it looks like OpenOCD starts to function!
Thank you so much 🙂
Although OpenOCD now starts up without errors, and even connects to the chip, I still cannot flash my STM32F7 microcontroller. The error I got initially (with the ‘older’ version of OpenOCD) still persists. I have explained everything in detail on this StackOverflow post: http://stackoverflow.com/questions/38033130/how-to-use-the-gdb-gnu-debugger-and-openocd-for-microcontroller-debugging-fr
Carmine Noviello, the writer of this book: https://leanpub.com/mastering-stm32
told me that he got my “.elf” file flashed through GDB – OpenOCD without problem to the STM32F7 microcontroller. He compiled the newest OpenOCD source code on his Macintosh.
Sadly Windows 10 seems to have some more troubles..
Kristof the problem is informations are too… fragmentary. I cannot help you in this way.
Are you using a toolchain? The toolchain usually provides a gdb server? The toolchain usually uses openocd? What compiler are you using?
I have always used ChibiStudio (eclipse, arm-none-eabi toolchain, openocd, gcc). I have just used my version on OpenOCD to flash and run a demo on STM32F7 using a pc with Win 10 64bit.
Hi Rocco,
I took on a personal mission to learn the whole embedded chain (compile – link – flash – debug) manually, without any IDE involved. So I’m using the windows cmd terminal to go through every step.
I have dedicated a detailed StackOverflow question to this procedure. You can find it here:
http://stackoverflow.com/questions/38033130/how-to-use-the-gdb-gnu-debugger-and-openocd-for-microcontroller-debugging-fr
Thank you so much for your help. You are really a kind guy!
I appreciate it so much. I’m sure that the community is grateful to you, for all the interesting articles on your website!
While I appreciate a lot your effort, I have a couple of tips if you are resolute to proceed in this way:
1. Uninstall winzozz!
2. Destroy every trace of winzozz using fire. Be careful. Use gloves and goggles: safety first!
3. If you are to ignoring first 2 tips, install an eclipse based toolchain like chibistudio in order to understand if compiler, cross compiler, gdb server and debugger work fine
4. Try to remove, automatisms one at a time.
Good luck 🙂
Hi, I am trying to follow the steps above, but failed at the following step. Any idea? Please help. Thanks.
$ makepkg-mingw -sLf==> Making package: mingw-w64-openocd-git 0.10.0.rc1.r1.gc404ff5-1 (15 Nov 2017 23:04:57)
==> Checking runtime dependencies...
==> Checking buildtime dependencies...
==> Retrieving sources...
-> Updating openocd git repo...
Fetching origin
==> Validating source files with sha256sums...
openocd ... Skipped
==> Extracting sources...
-> Creating working copy of code git repo...
Reset branch 'makepkg'
==> Starting prepare()...
which: no libtoolize in (/mingw32/bin:/mingw32/bin:/usr/local/bin:/usr/bin:/bin:/c/Windows/System32:/c/Windows:/c/Windows/System32/Wbem:/c/Windows/System32/WindowsPowerShell/v1.0/)
which: no glibtoolize in (/mingw32/bin:/mingw32/bin:/usr/local/bin:/usr/bin:/bin:/c/Windows/System32:/c/Windows:/c/Windows/System32/Wbem:/c/Windows/System32/WindowsPowerShell/v1.0/)
./bootstrap: Error: libtool is required
==> ERROR: A failure occurred in prepare().
Aborting...
Hi,
usually I follow this procedure from time to time in order to build a fresh OpenOCD for ChibiStudio. Everytime I usually update this guide which actually is a reminder for my self. I run this procedure last time few month ago and it worked. I am not an expert but I think that maybe the problem is that you do not have installed the base development packages
pacman -S base-devel
Let me know if you succeed or we will find a way out together and I will update this guide. Thanks for your feedback.
Thanks for the great tutorial!
Since I needed to build a specific version of OpenOCD, I wasn’t sure how to specify this in the source URL. In case anyone else needs it here is an example:
git+https://github.com/ntfreak/openocd.git#tag=v0.10.0-rc2
And here is the link where this is documented:
https://jlk.fjfi.cvut.cz/arch/manpages/man/PKGBUILD.5#USING_VCS_SOURCES
Thanks for commenting and sharing additional info.
I just used this page again to make a fresh OpenOCD installation. Thanks!
Please consider adding the following commands at the end of paragraph 4.1:
# git config –global pack.windowMemory “100m”
# git config –global pack.packSizeLimit “100m”
# git config –global pack.threads “1”
These commands enlarge the memory allocated to git, preventing crashes when cloning large repositories.
Hey Kristof,
thanks for commenting. I am updating the article right now.
Hi Rocco, that’s great :-). Is the patch you mentioned in paragraph 7.1 still needed for the latest openocd version?
Hey there,
as far as I know, that patch has been already merged long time ago. I left the paragraph as example in case user has to patch something else…
Hello Rocco, Thank you very much for this great valuable blog..I was able to execute all the steps you mentioned here successfully and able to build my custom modified openocd binary very fast..I appreciate the clean descriptions of steps in this article.. I was skeptical about the build with so many dependencies of many components but overall I didn’t see any issues. Only problem I see is the time taken to complete the build.configure script takes much time to finish before compilation starts.I wanted to know if there is a way to override the configure procedure for successive makes.
Hello Vimal,
thanks. To be honest, I wrote this guide to myself the first time I was able to build OpenOCD. Since then, I am using and updating it every time I am building OpenOCD under Windows. Also, there are many contribution to this article for other users whom experienced issues during the process.
That said, i think this is the topic I am less confident of in the entire blog. If there is any way to override the configure procedure, I do not know it. If you will find anything interesting about this, please come back and contribute: I will update he article with your finding.
Hello Rocco,
For the purpose of making openOCD builds faster I edited the /mingw-packages/mingw-w64-openocd-git/ PKGBUILD and now my openOCD build process will complete within 10 minutes, earlier with the original PKGBUILD it took around 45 minutes to 1 hour to get finished.The edited PKGBUILD file is copied below.I removed the git repo update in PKGBUILD along with pkgver(), prepare() function invocations and ./configure script run.The removal of git repo update from PKGBUILD is anyway a must if you have changed the openOCD source code for something since otherwise when you build it without removing git repo update your local changes will be replaced with the original git repo code.
# Maintainer: Andrew Leech

# Contributor: Ray Donnelly

# Contributor: Rocco Marco Guglielmi
_realname=openocd
pkgbase=mingw-w64-${_realname}-git
pkgname="${MINGW_PACKAGE_PREFIX}-${_realname}-git"
provides=("${MINGW_PACKAGE_PREFIX}-${_realname}")
conflicts=("${MINGW_PACKAGE_PREFIX}-${_realname}")
pkgver=0.10.0.r1293.g7c88e76a7
pkgrel=1
pkgdesc="OpenOCD - Open On-Chip Debugger (mingw-w64)"
arch=('any')
url="http://openocd.org/"
license=("GPLv2")
options=('!ccache')
depends=("${MINGW_PACKAGE_PREFIX}-hidapi"
"${MINGW_PACKAGE_PREFIX}-libusb"
"${MINGW_PACKAGE_PREFIX}-libusb-compat"
"${MINGW_PACKAGE_PREFIX}-libftdi"
"${MINGW_PACKAGE_PREFIX}-libjaylink")
makedepends=("${MINGW_PACKAGE_PREFIX}-gcc"
"${MINGW_PACKAGE_PREFIX}-pkg-config"
)
build() {
cd "${srcdir}"/${_realname}
make
}
package() {
cd "${srcdir}"/${_realname}
make DESTDIR="${pkgdir}" install
install -Dm644 COPYING ${pkgdir}${MINGW_PREFIX}/share/licenses/${_realname}/COPYING
# bsdtar can't convert non-ascii filenames to UTF-8 when run in
# non-UTF-8 locale. It proceeds to pack them anyway embedding raw
# binary filenames in the traditional tar headers.
}
Hello Vimal,
thanks for contributing. Next time I am going to build OpenOCD I’ll give a try to your mods and eventually fix\update the article.
Hello Rocco,
I am now looking for a way to build the open OCD arm binary for a cortex A core running in Linux.I have found some options like XPack Open OCD which provides build scripts for compiling OpenOCD source code for ARM platform but it needs a dedicated ARM hardware (The current platform for Arm GNU/Linux and Windows production builds is a Debian 9, running on a ROCK Pi 4 with 4 GB of RAM and 256 GB of fast M.2 SSD.). Is there any way to cross compile the OpenOCD source for ARM platform in Windows/Linux ?
Hello Vimal,
to be honest I ma not so expert. I barely found a way to build OpenOCD under Windows and what you are seeing it’s a tutorial for my self I am updating every time I am building openocd.
I would suggest you to go ask on their official IRC channel
http://openocd.org/discussion/irc/
Hello Rocco,
I am trying to build OpenOCD for RV64 based SoC system, but I stucked at ‘cd ~/MINGW-packages/mingw-w64-openocd
makepkg-mingw -sLf’ step.
After I execute ‘makepkg-mingw -sLf’ command, there is no directory named /ming-w64-openocd-git’.
How can I solve this problem?
Hi,
did you try to check if that folder exists after cloning the git repo?
Hi, I’ve solved previous problem, but i faced another problem.
I’m trying to execute a command below this sentence. (From step 5.)
‘cp -avr /${MINGW_FOLD}/bin/libgcc_s_dw2-1.dll ~/openocd/bin’
However, I cannot find ‘libgcc_s_dw2-1.dll’ and instead I found libgcc_s_seh-1.dll.
Is that ok to use ‘libgcc_s_seh-1.dll’? or how can i find ‘libgcc_s_dw2-1.dll’file?
Hi, I’ve solved this provlem too. I downloaded libgcc_s_dw2-1.dll from the internet.
Then, if i want to use built openocd in command prompt, should i move to msys64/home/user/openocd?