
How to duplicate a project in ChibiStudio
Introduction
The easiest way to start a new development in ChibiOS is to duplicate a previous project. So make sure to have an imported project in your Project Explorer before proceeding. This guide will demonstrate how to duplicate a project.
Step by Step Procedure
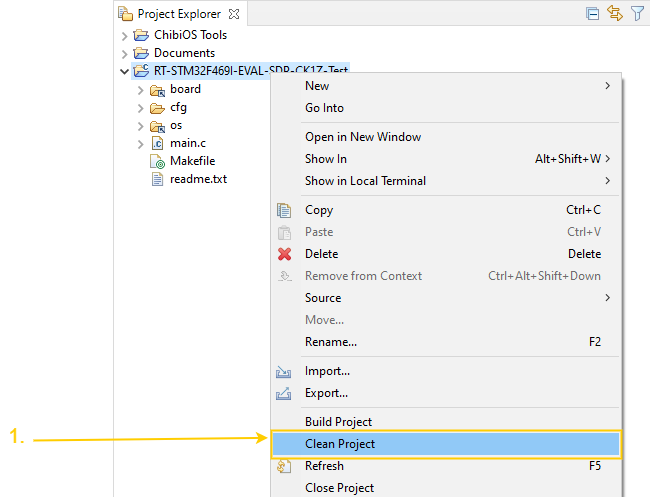
Clean the project
- Right click on the project and select Clean Project
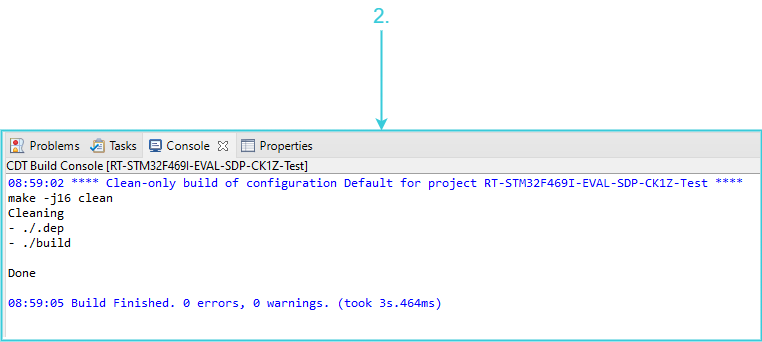
- Check the console when the cleaning task is completed
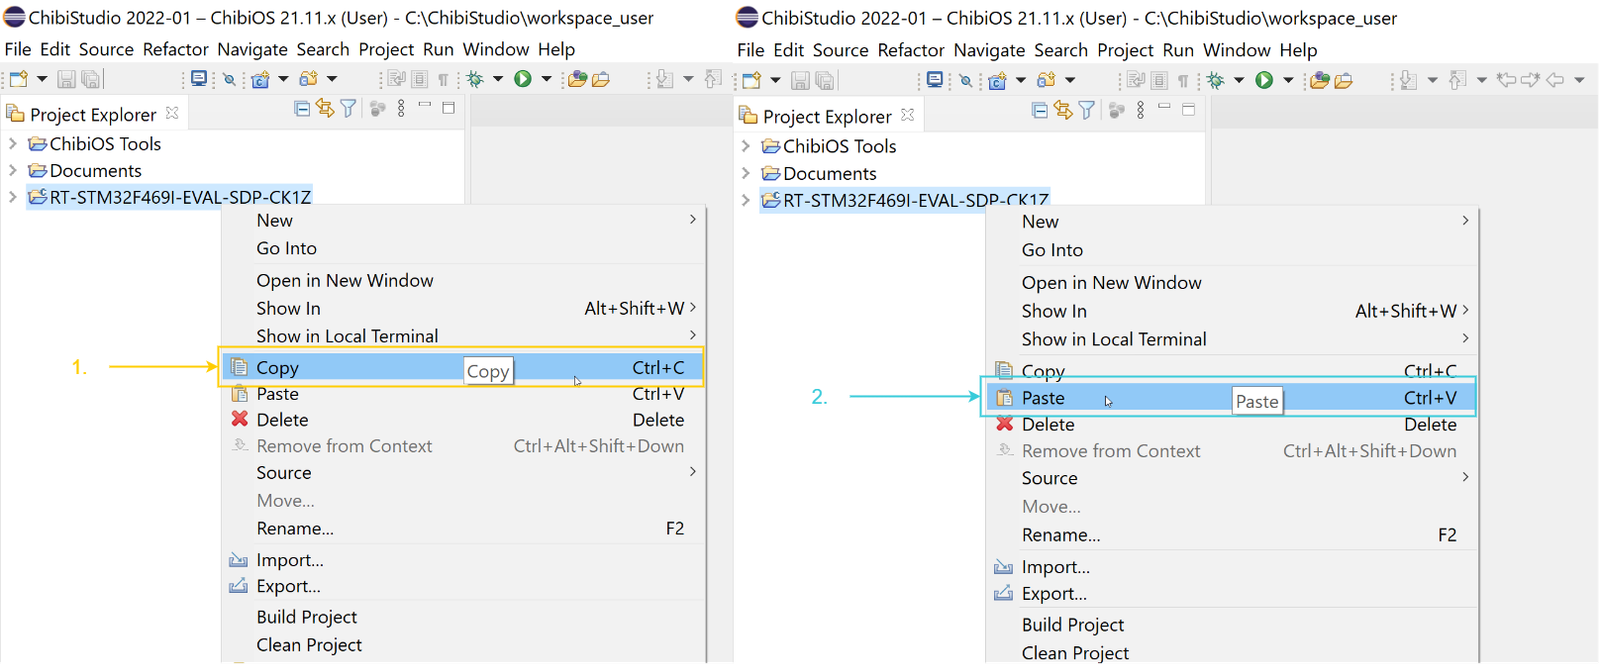
Duplicate the project
- Right click on the project and select Copy (or CRTL+C)
- Right click in the Project Explorer and select Paste (or CRTL+V)
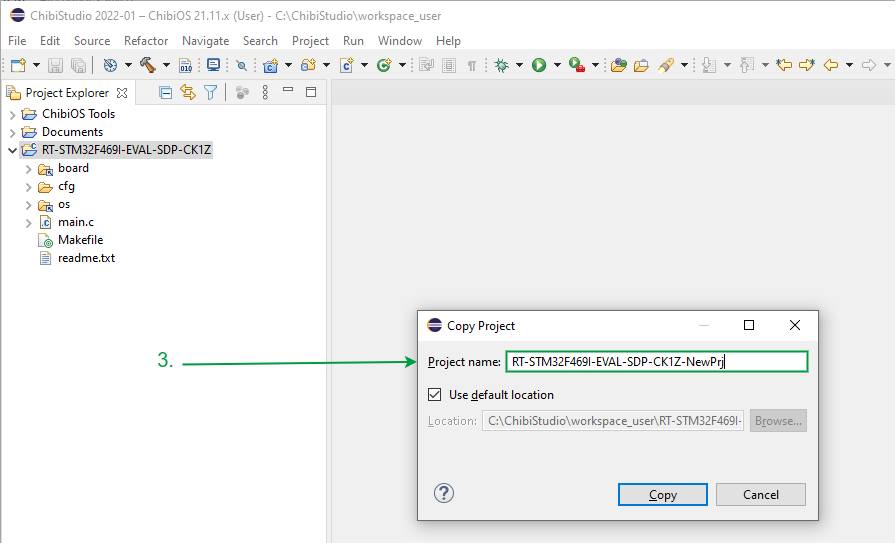
- Name the new project or leave the default name
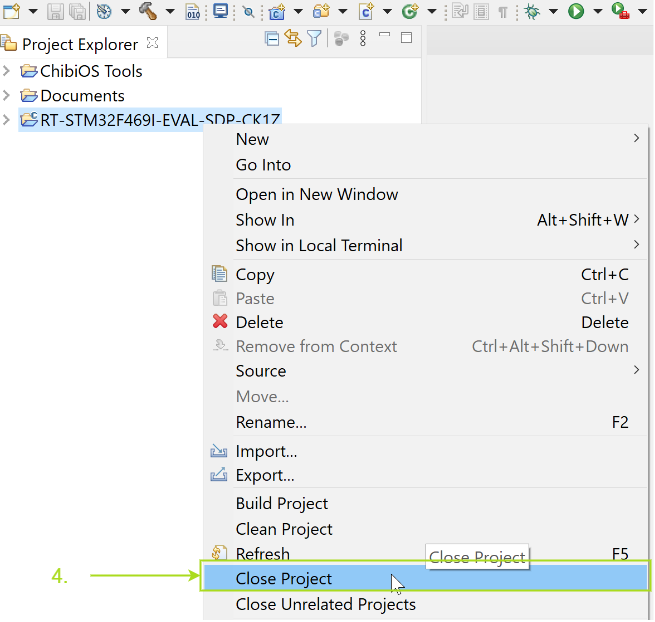
- Right click on the old project and select Close Project
Fix the Makefile
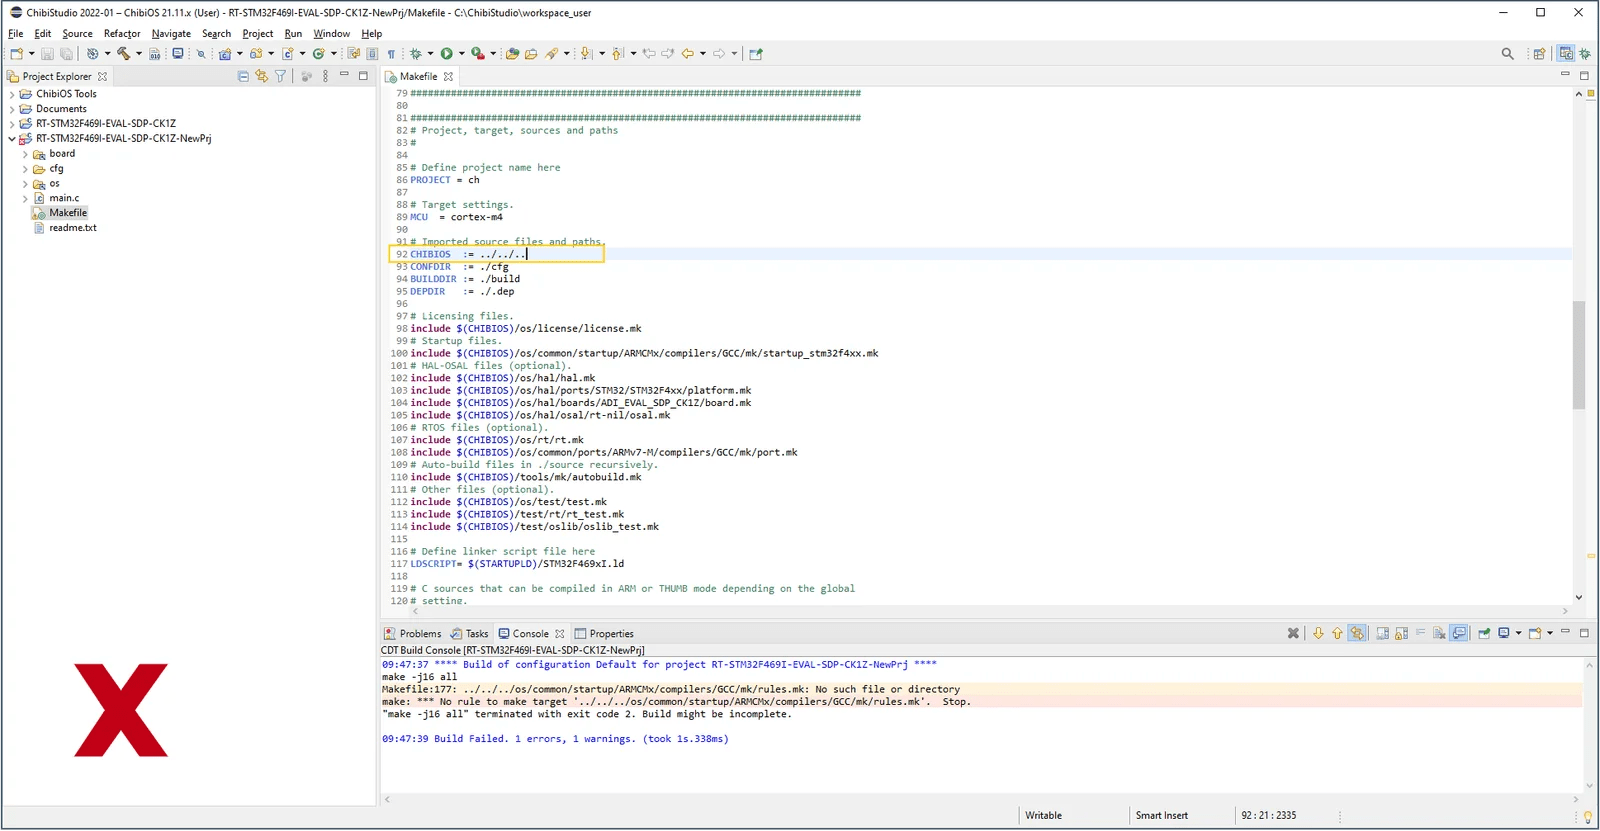
If the project you have duplicated was not located in the workspace folder you need to change a line in the Makefile otherwise the build procedure will fail. If you try to build the project then you will get the error “No rule to make target” in the console log.

This issue is caused by the fact that the relative path of ChibiOS folder is different due to the relocation of the copied project. To fix the issue:
- Open the Makefile
- Change the relative path of
CHIBIOS - Right click on the project and select Build (or click on the hammer button)


After this fix is done the project will build successfully.
Example for fixing the Makefile
Duplicate a project already available in ChibiStudio from the ChibiOS version folder (see How to import a project in ChibiStudio).
For example, import and duplicate a project from chibios2111 folder (ChibiOS version 21.11.x).
- Open the Makefile
- Change the relative path of
CHIBIOSto../../chibios2111 - Right click on the project and select Build (or click on the hammer button)
In example the path of the ChibiOS folder is C:\ChibiStudio\chibios2111 while the path of the Makefile is C:\ChibiStudio\workspace_user\RT-STM32F469I-EVAL-SDP-CK1Z-NewPrj. Consequently, the relative path of ChibiOS is ..\..\chibios2111 (where double dot refers to the parent folder).

Be the first to reply at How to duplicate a project in ChibiStudio