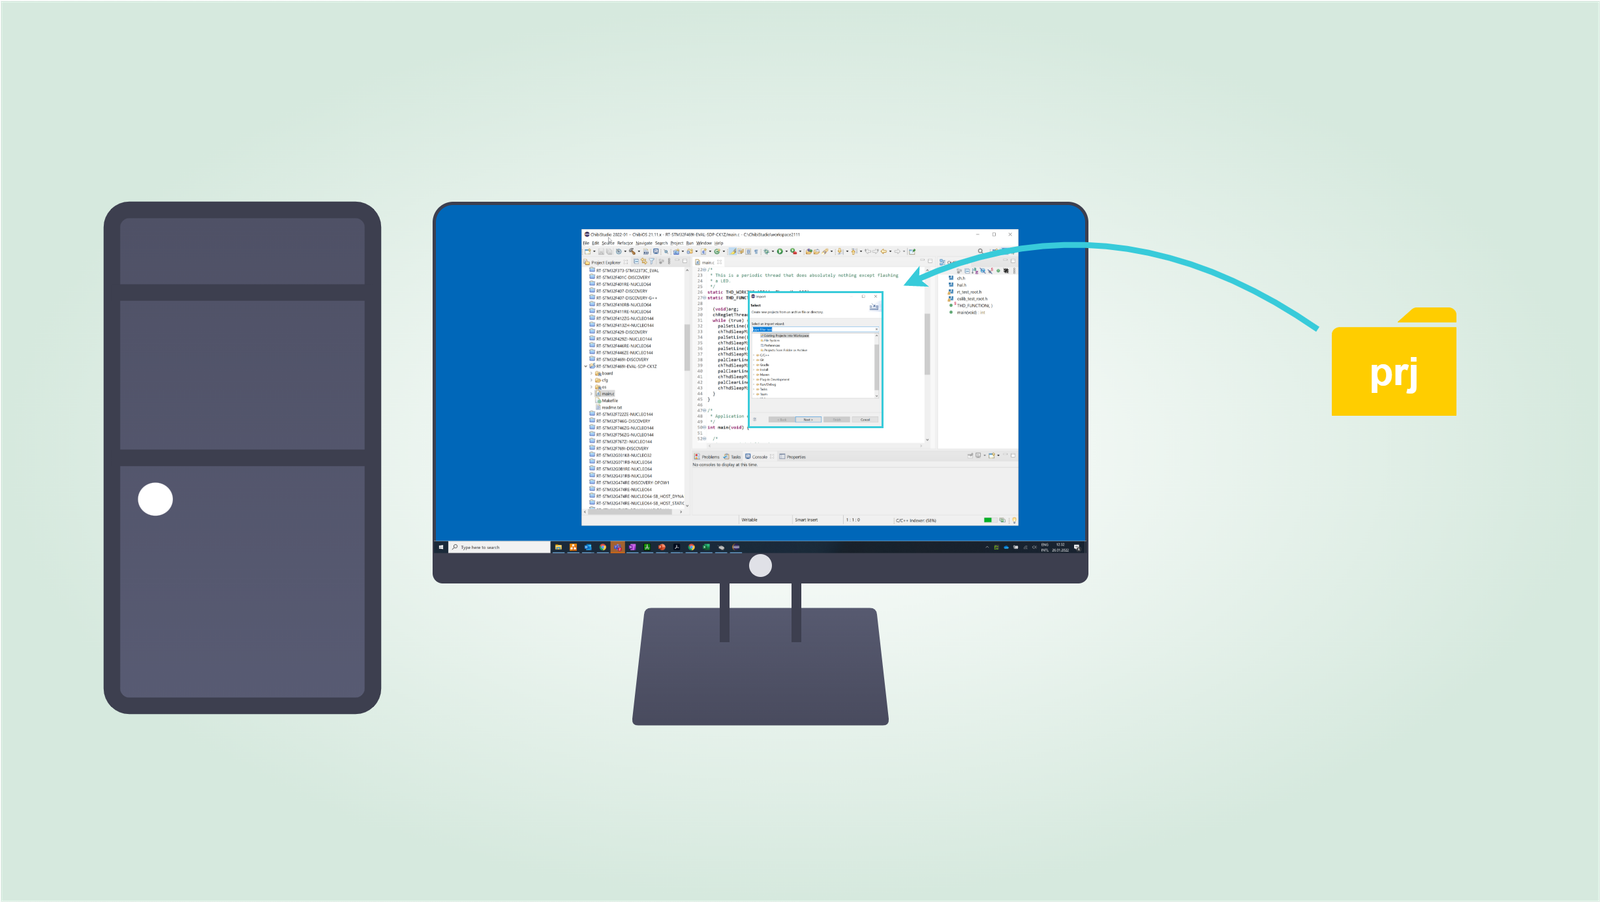
How to import a project in ChibiStudio
Introduction
This guide will show you how to import an existing project into ChibiStudio. For this you will need an existing project that is already ready to use. It is strongly recommended to keep projects together in a workspace folder inside C:\ChibiStudio.
Step by Step procedure
Import a project
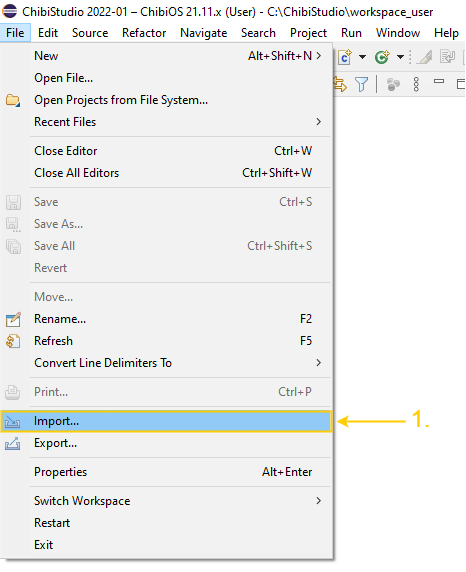
- Select Import from File
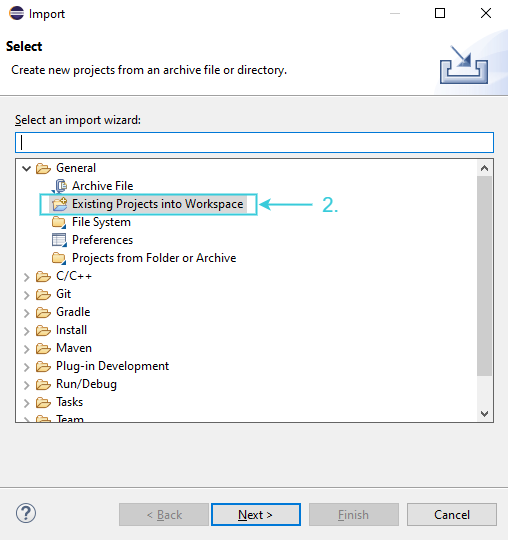
- Choose Existing Project into Workspace
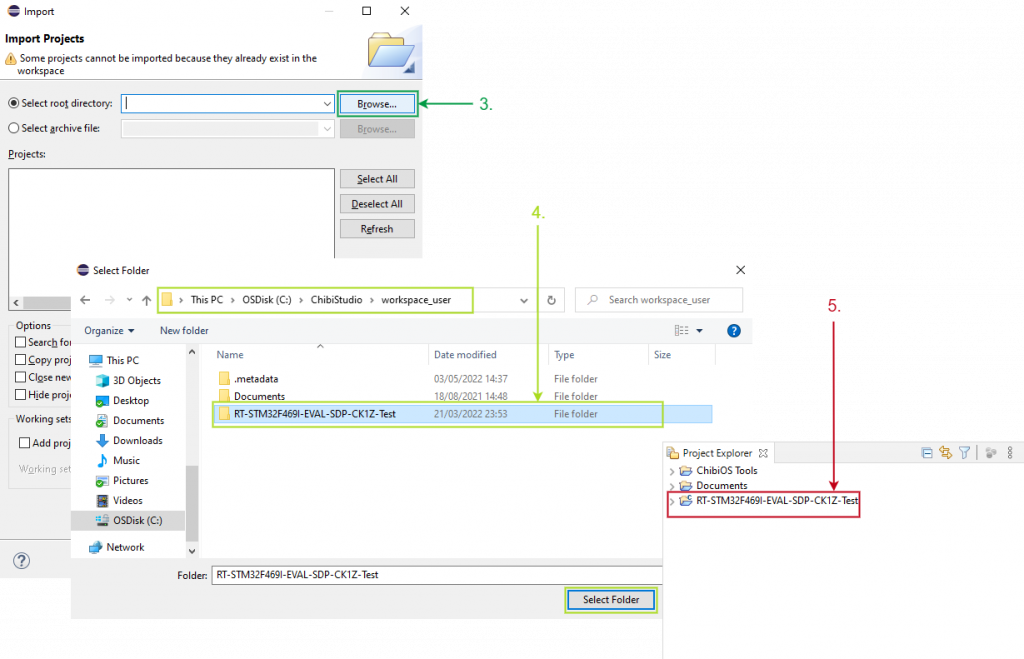
- Click Browse in the Select root directory
- Choose the folder you wish to import the project
- The imported project is visible in the Project Explorer
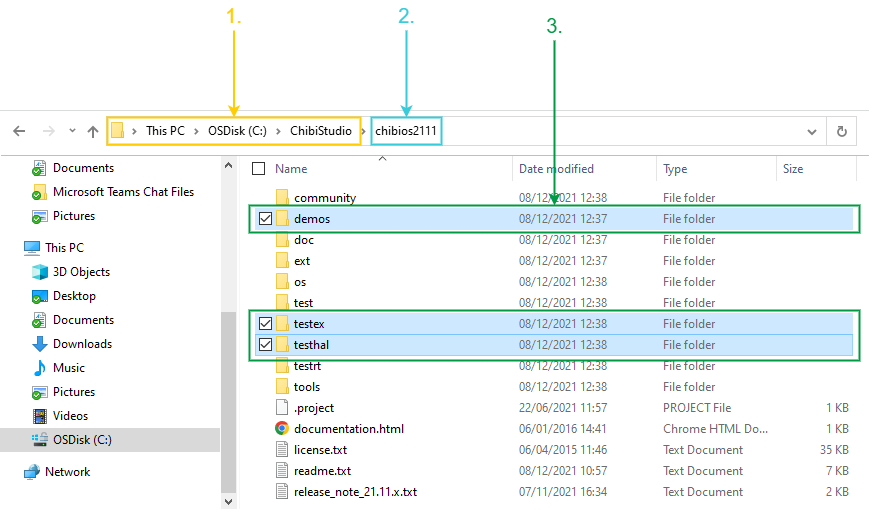
Select a project already available with ChibiStudio
- Open ChibiStudio folder
- Select ChibiOS version you are using
- Navigate demos, testex or testhal to select a project
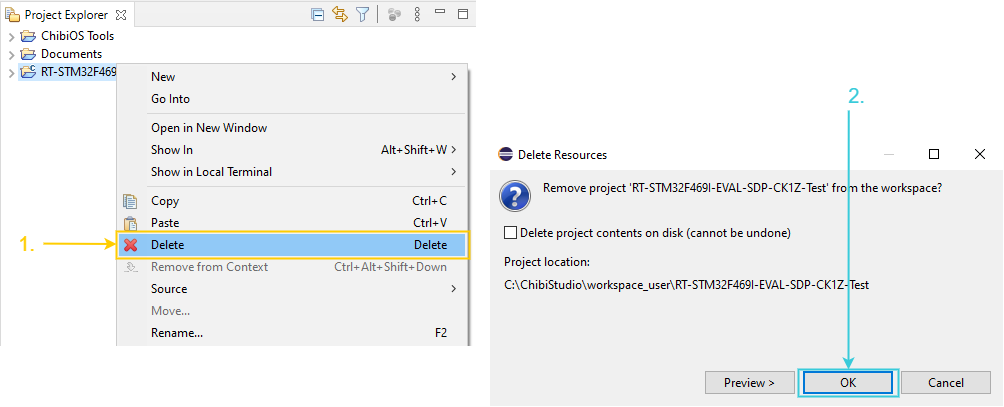
Delete imported project
- Right click on the imported project and select Delete
- Click OK
Be the first to reply at How to import a project in ChibiStudio